Self-signed certificate is an important part of any consultant’s life. It is not recommended to use in production. We are often forced to use it in production because hosts are in a workgroup or the host’s domain cannot be verified online to get an SSL from public CA like GoDaddy or digicert.
My area of work involves working mostly on Windows platform and hence my go-to utility for creating the certificate was IIS management console. The tool is easy to use and the certificate is generated with a single click. The major drawback of this process is, the certificate is valid for only one year. You need to generate the certificate everyone year and deploy that in all servers and clients. A google search for tool to generate SSL with custom validity returned lots of third-party tools that require installation.
Using the below process, you can create a self signed certificate that literally never expires from Windows Powershell. You don’t need to install any third party applications or solutions.
- Open Windows Powershell as Administrator.
- Copy the following code and Hit Enter.
Use the below code, if you want to generate the SSL for the computer you are logged in. This will automatically fetch the computer name.
New-SelfSignedCertificate -DnsName ([System.Net.Dns]::GetHostEntry([string]$env:computername).HostName) -NotAfter (Get-Date).AddYears(10) -CertStoreLocation Cert:\LocalMachine\My -TextExtension @("2.5.29.37={text}1.3.6.1.5.5.7.3.1") -keyusage @("DigitalSignature", "KeyEncipherment", "DataEncipherment") -KeySpec KeyExchangeUse the code below if you want to create the certificate hostname. Don’t forget to replace google.com with your domain/computer name.
New-SelfSignedCertificate -DnsName google.com -NotAfter (Get-Date).AddYears(10) -CertStoreLocation Cert:\LocalMachine\My -TextExtension @("2.5.29.37={text}1.3.6.1.5.5.7.3.1") -keyusage @("DigitalSignature", "KeyEncipherment", "DataEncipherment") -KeySpec KeyExchangeThe above script will create an SSL with 10 years of validity that can be used for Digital Signature. You can modify the validity of the certificate by changing AddYears(10) variable. Please refer Microsoft documentation more details on how to use this PowerShell module.
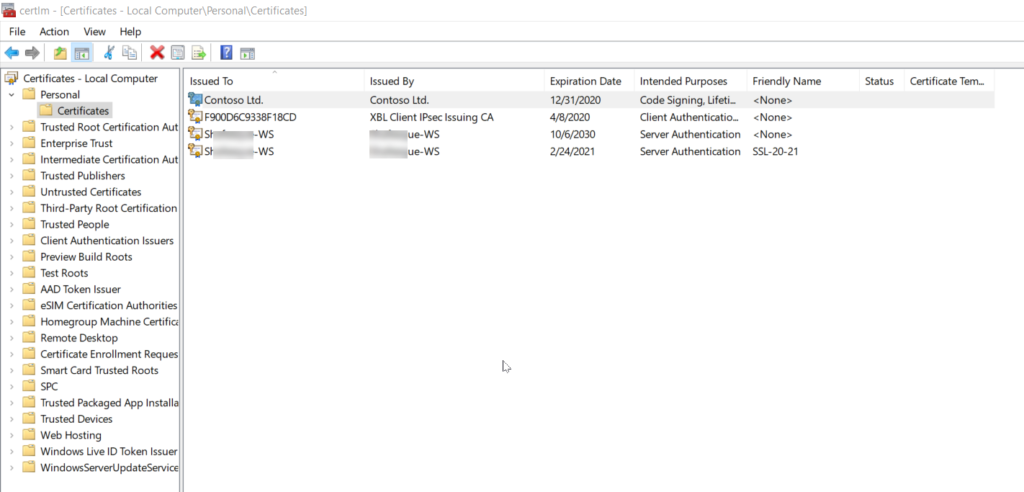
By default, the generated Certificate will be available in Local Computer/My Folder/Personal/Certificates
To view the certificate, Run the command certlm from elevated PowerShell or Command Prompt.

The Certificate console will open to Local machine folder.

Thanks Juergen Kretschek from Microsoft Dynamics support for introducing New-SelfSignedCertificate PS module to me.
Pingback: Browser not trusting self signed certificate even after importing into the Trusted root certificate folder | Dynamics Retail by Shafeeque Mohammed
I’m unable to make this work so far. You gave some great information, but I am still getting a security error. I will try rebooting my PC in hopes that will fix this. I’ve tried the cert on both Localhost and another I created on my development pc. Localhostdev. I also moved/copied the cert to the Trusted Root Certificate
Your connection isn’t private
Attackers might be trying to steal your information from localhostdev (for example, passwords, messages, or credit cards).
NET::ERR_CERT_AUTHORITY_INVALID
Thank you for the detailed explanation,
Kindly could you point out How to apply Certificate Name while creating the certificate?
You can try using the parameter -FriendlyName.